# Project Setup
## Java
Wrappers available for Java:
| Wrapper | Author | GitHub | Source | Documentation |
| ---------- | -------- | ----------------------------------------------- | ---------------------------------------------------------------------------------------- | -------------------------------------------------------------------------- |
| jGLFW | badlogic | [github.com](https://github.com/badlogic/jglfw) | [gitbub.com](https://github.com/badlogic/jglfw/tree/master/jglfw/src/com/badlogic/jglfw) | - |
| LWJGL-GLFW | LWJGL | [github.com](https://github.com/LWJGL/lwjgl3) | [github.com](https://github.com/LWJGL/lwjgl3/tree/master/modules/lwjgl/glfw) | [lwjgl.org](https://javadoc.lwjgl.org/org/lwjgl/glfw/package-summary.html) |
*In this guide, LWJGL-GLFW will be used. There are no plans to add a how-to for jGLFW. LWJGL-GLFW requires the LWJGL core, and since* [*STB*](https://github.com/nothings/stb) *will be used in this guide, we will also add LWJGL-STB.*
### Maven
This assumes, you have already created a Maven project and have some familiarity with Maven's `pom.xml` file.
Depending on your operating system, add the following to your `pom.xml`:
{% tabs %}
{% tab title="Windows" %}
```markup
3.2.3
natives-windows-x86
org.lwjgl
lwjgl-bom
${lwjgl.version}
import
pom
org.lwjgl
lwjgl
org.lwjgl
lwjgl-glfw
org.lwjgl
lwjgl-stb
org.lwjgl
lwjgl
${lwjgl.natives}
org.lwjgl
lwjgl-glfw
${lwjgl.natives}
org.lwjgl
lwjgl-stb
${lwjgl.natives}
```
{% endtab %}
{% tab title="Linux" %}
```markup
3.2.3
natives-linux
org.lwjgl
lwjgl-bom
${lwjgl.version}
import
pom
org.lwjgl
lwjgl
org.lwjgl
lwjgl-glfw
org.lwjgl
lwjgl-stb
org.lwjgl
lwjgl
${lwjgl.natives}
org.lwjgl
lwjgl-glfw
${lwjgl.natives}
org.lwjgl
lwjgl-stb
${lwjgl.natives}
```
{% endtab %}
{% tab title="macOS" %}
```markup
3.2.3
natives-macos
org.lwjgl
lwjgl-bom
${lwjgl.version}
import
pom
org.lwjgl
lwjgl
org.lwjgl
lwjgl-glfw
org.lwjgl
lwjgl-stb
org.lwjgl
lwjgl
${lwjgl.natives}
org.lwjgl
lwjgl-glfw
${lwjgl.natives}
org.lwjgl
lwjgl-stb
${lwjgl.natives}
```
{% endtab %}
{% endtabs %}
If you require a more complex dependency setup, for example supporting multiple operating systems, head to [lwjgl.org](https://lwjgl.org/customize) and easily build a `pom.xml` specific to your needs.
### Gradle
This assumes, you have already created a Gradle project and have some familiarity with Gradle's `build.gralde` file.
Depending on your operating system, add the following to your `build.gradle`:
{% tabs %}
{% tab title="Windows" %}
```groovy
project.ext.lwjglVersion = "3.2.3"
project.ext.lwjglNatives = "natives-windows-x86"
repositories {
mavenCentral()
}
dependencies {
implementation platform("org.lwjgl:lwjgl-bom:$lwjglVersion")
implementation "org.lwjgl:lwjgl"
implementation "org.lwjgl:lwjgl-glfw"
implementation "org.lwjgl:lwjgl-stb"
runtimeOnly "org.lwjgl:lwjgl::$lwjglNatives"
runtimeOnly "org.lwjgl:lwjgl-glfw::$lwjglNatives"
runtimeOnly "org.lwjgl:lwjgl-stb::$lwjglNatives"
}
```
{% endtab %}
{% tab title="Linux" %}
```groovy
project.ext.lwjglVersion = "3.2.3"
project.ext.lwjglNatives = "natives-linux"
repositories {
mavenCentral()
}
dependencies {
implementation platform("org.lwjgl:lwjgl-bom:$lwjglVersion")
implementation "org.lwjgl:lwjgl"
implementation "org.lwjgl:lwjgl-glfw"
implementation "org.lwjgl:lwjgl-stb"
runtimeOnly "org.lwjgl:lwjgl::$lwjglNatives"
runtimeOnly "org.lwjgl:lwjgl-glfw::$lwjglNatives"
runtimeOnly "org.lwjgl:lwjgl-stb::$lwjglNatives"
}
```
{% endtab %}
{% tab title="macOS" %}
```groovy
project.ext.lwjglVersion = "3.2.3"
project.ext.lwjglNatives = "natives-macos"
repositories {
mavenCentral()
}
dependencies {
implementation platform("org.lwjgl:lwjgl-bom:$lwjglVersion")
implementation "org.lwjgl:lwjgl"
implementation "org.lwjgl:lwjgl-glfw"
implementation "org.lwjgl:lwjgl-stb"
runtimeOnly "org.lwjgl:lwjgl::$lwjglNatives"
runtimeOnly "org.lwjgl:lwjgl-glfw::$lwjglNatives"
runtimeOnly "org.lwjgl:lwjgl-stb::$lwjglNatives"
}
```
{% endtab %}
{% endtabs %}
If you require a more complex dependency setup, for example supporting multiple operating systems, head to [lwjgl.org](https://lwjgl.org/customize) and easily build a `gradle.properties` specific to your needs.
### IntelliJ IDEA / Eclipse
This assumes, you have already created an IntelliJ IDEA or Eclipse project and are somewhat familiar with your IDE of choice.
1. Open [lwjgl.org](https://lwjgl.org/customize) and select `Release`.
2. Adjust the following settings:
* Options: `Include source`, `Include JavaDoc`
* Natives: *choose depending on your needs*
* Presets: `None` (*to deselect everything*)
* Contents: `LWJGL core`, `GLFW`, `stb`
3. Hit `DOWNLOAD ZIP` and extract the downloaded archive into a folder in your project root (e.g. `lib`).
{% tabs %}
{% tab title="IntelliJ IDEA" %}
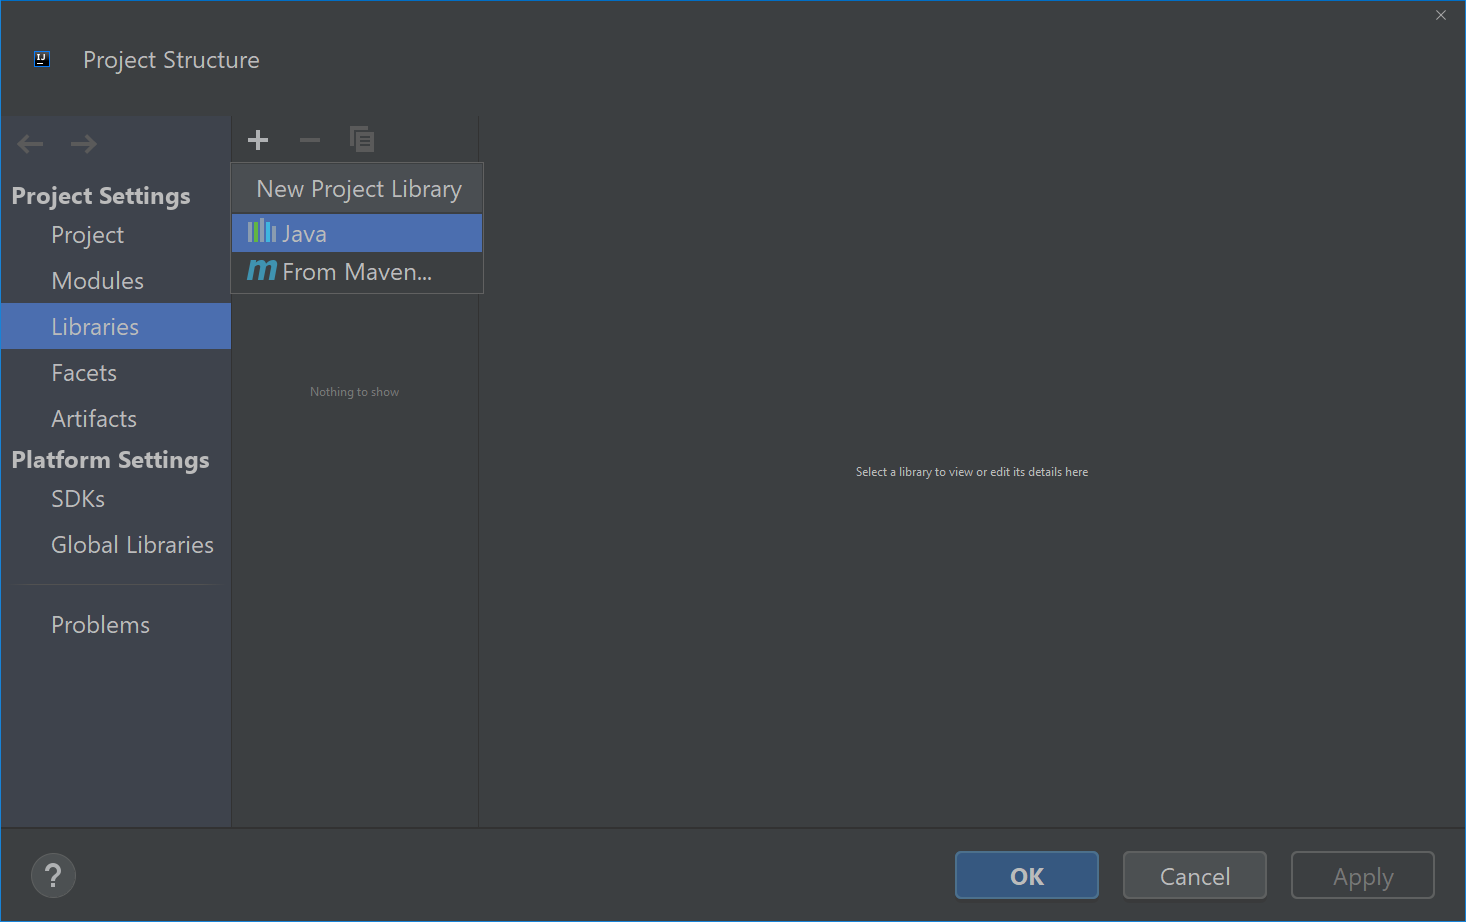
{:start="4"} 4. Open `Project Structure` by pressing  in the top right corner, or `CTRL+ALT+SHIFT+S` / `⌘Cmd+;`. 5. Select the tab `Libraries` on the left, click on  and select `Java`:\
 6. Specify your libraries location (selecting the top-level folder is enough), and select the modules to add your libraries to:\
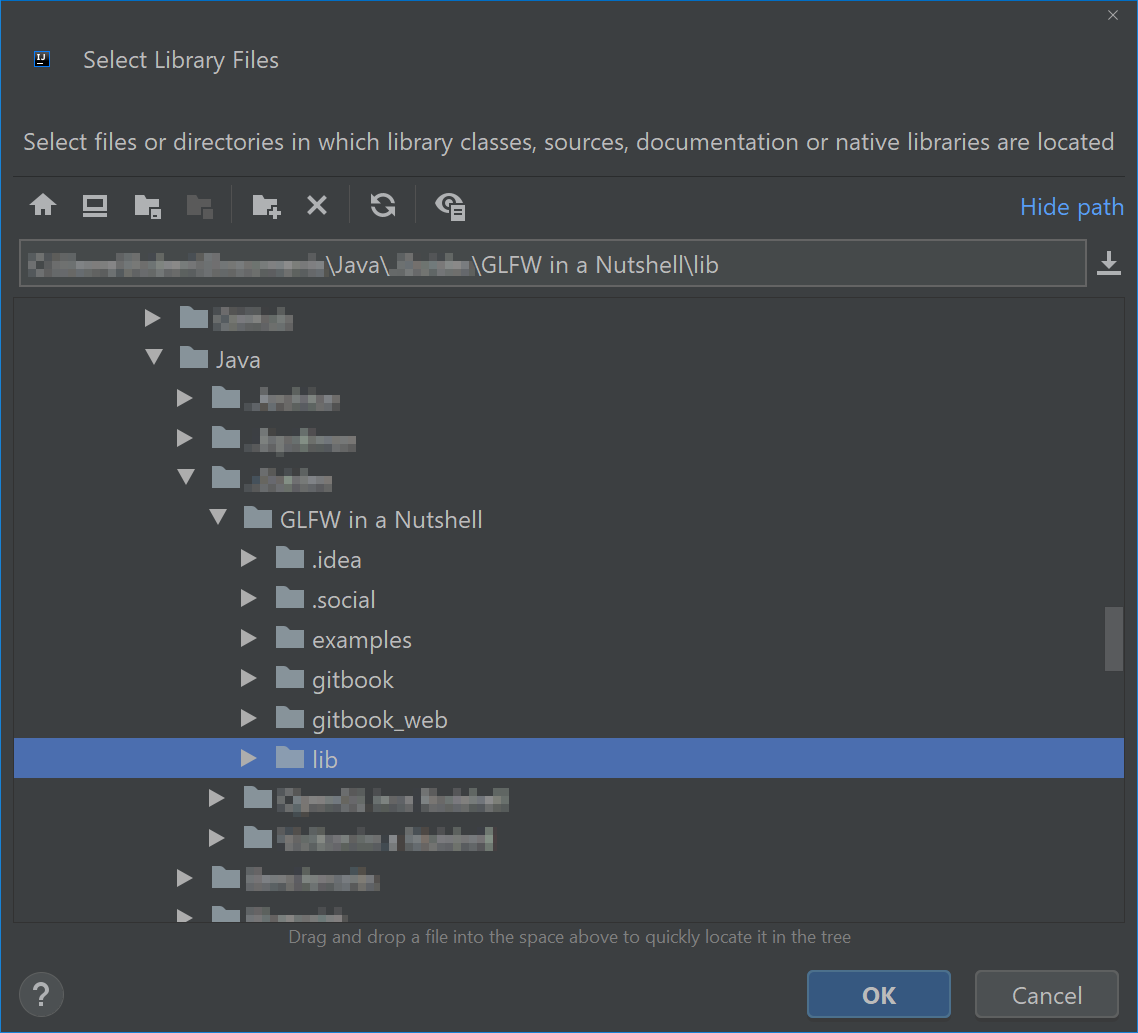 \
Note: *When selecting a folder as library file, IntelliJ classifies jars containing JavaDoc and natives under `Classes`. This is purely visual - JavaDocs and natives are correctly added.* 7. Save your Project Settings by clicking `Okay.`
{% endtab %}
{% tab title="Eclipse" %}
TODO
{% endtab %}
{% endtabs %}
---
# Agent Instructions: Querying This Documentation
If you need additional information that is not directly available in this page, you can query the documentation dynamically by asking a question.
Perform an HTTP GET request on the current page URL with the `ask` query parameter:
```
GET https://desertcookie.gitbook.io/glfw-in-a-nutshell/preparation/project-setup.md?ask=
```
The question should be specific, self-contained, and written in natural language.
The response will contain a direct answer to the question and relevant excerpts and sources from the documentation.
Use this mechanism when the answer is not explicitly present in the current page, you need clarification or additional context, or you want to retrieve related documentation sections.